Alright. Now that we've learned how to make a belly from the outside, it's time to make a belly from the inside.
The first step is to select the delectible little morsel that is to be your victim.
There are two things you're looking for here; pose and lighting. Essentially, you're looking for the following criteria:
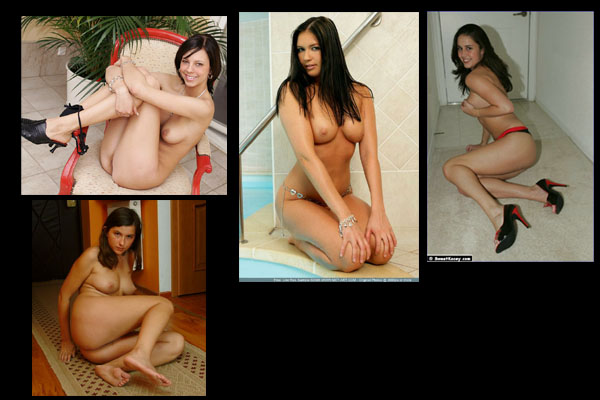
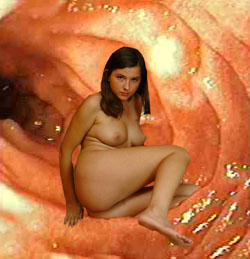
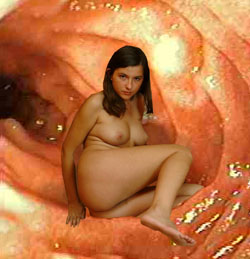
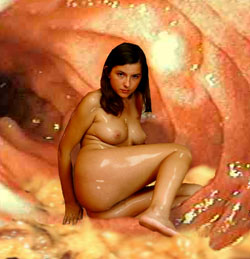
Here's a few examples of the kinds of pics to look for:
Each of them look like they could fit snugly into a stomach, don't they?
Next you need to pic the digestive organ you're going to put them in. It can be hard to find pictures of the inside of the stomach; that's why I've just gone ahead and uploaded the collection I use. I'm a generous bastard that way.
For the most part, just try to choose a pic where the shape of the stomach seems to match with the person's pose and level of perspective (or can be fiddled with to match). Now, this is important--you will not just be using one stomach picture. The one you're picking now is just the preliminary background. We will be custom-tailoring a totally unique stomach for our lucky meal.
I've decided to go with the lower left picture, and this stomach to go with it:

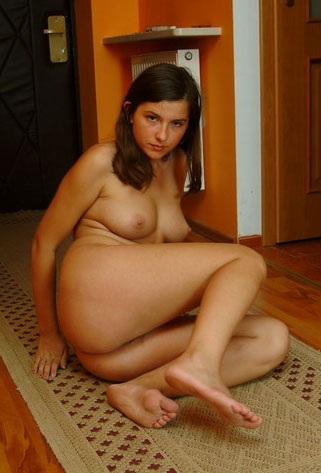
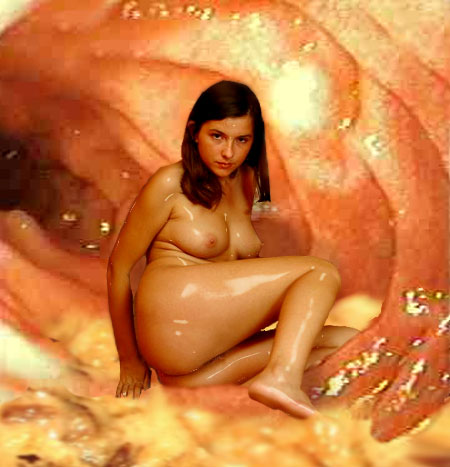
For those at home who want to play along, here's the full-sized original of our soon-to-be snack:
Now, the first thing we need to do is copy her out of her current background. Generally the easiest way to do this is with the magnetic lasso tool, which is one of the subtools of the lasso tool:

To select it, click and hold the mouse button over the lasso tool and select "Magnetic Lasso Tool" from the menu that appears.
The way the magnetic lasso works is it tries to figure out where the borders are around an object by how different the color values are. You still need to lead it around, and you'll need to clean it up a little bit when you're done, but it makes the initial selection process a lot faster (especially in pictures where the person and the background are very different).
Click on the edge of the girl's upper arm, between the skin and the black area. Then start tracing around her body. Don't worry if the lasso does some stupid things; we will be filling them in later.
Once you've traced around the girl, go in and remove any extra parts of the background the lasso may have picked up, and add in any parts of the girl it missed. You can do this either with the normal lasso tool or by painting in quickmask mode (which was explained in the previous tutorial).
Once the selection is to your liking, copy the character and immediately paste it into a new later. Make the original layer invisible so you can inspect the cut-out; if there are problems, you can get your original selection back by CTRL-clicking on the thumbnail in the layers menu:
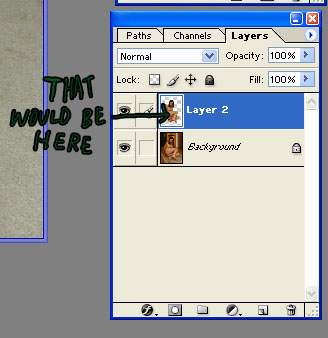
You can then go back to the first layer and make whatever corrections you feel are necessary, then copy and paste again.
Once you've got your girl the way you want her, open up your stomach image. Before you do anything else, resize it to match your girl's needs (generally I make it at least 25% larger than the girl herself so I have some room to work). Then paste your girl on in there.
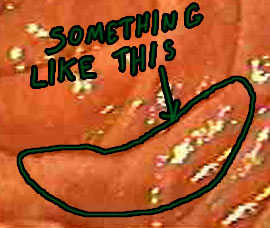
So now, we've got something like this:
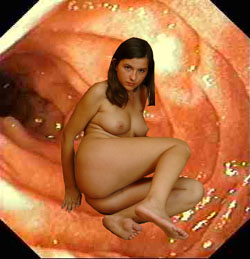
Now we just need to make her fit.
First, we need to get rid of those black edges. Duplicate the stomach layer, select the black edges with the magic wand tool (The one next to the lasso tool) and hit delete. Then go back down to the original layer and resize it until it fills all of the gaps. Go back to the second layer and, using a soft brush, erase around the edges until the two are blended.

Now we're gonna pull some trippy shit. Move her down slightly and rotate her a hair counterclockwise so it looks like her hand is resting on the stomach ridge to the left. Now hide the layer she's on (the little eyeball icon next to the layer) and go back to one of the stomach layers. Select around a fold of stomach tissue:
...and copy it. Now turn the girl's visibility back on and make a new layer above her (to do this, press the little tiny button underneath the X in the layers menu and select "New Layer"). Paste your little stomach fold on top of her and blend it in using the eraser and/or the smudge tool:

Looks a little weird, and that's because the perspective isn't strong enough for that fold to really be overtop of her that way. But we're going to fix that. Select the mask for the girl (CTRL-click on her icon in the layers window, remember) and go to the layer with the fold on it. (You might want to duplicate it before you do this, in case you screw up. I always do.)
In the layers window, crank it's opacity down to 50% so you can see what you're doing, then erase the parts that are in front of her front leg but not her back leg:
Better, but still looks a bit squished. This is where we start to employ some lighting tricks. We can create an illusion of greater depth in the places where we want it by throwing down some shadows.
Create a new layer between the bottom stomach and the girl. Set the layer type to "Multiply" (That's in the drop-down menu next to Opacity) and select a very light grey color with a touch of extra red. Set the brush type to multiply as well (this dropdown menu should be at the top of the screen). Paint in some shadows behind the girl and, in particular, next to her legs where the problem area is:
She's starting to look better--problem is, now it's her front leg that looks bad. Make a new layer above it and draw in a bit of shadow there as well. To remove shadows that are overlapping her foot, simply CTRL-click the stomach fold layer, hit CTRL-I (this inverts your current selection) and hit delete.
There's one final touch to making the perspective look half-decent: putting in a foreground. To do this, we're going to steal a piece of one of our other pics.
You know what always seems to make a good foreground? Glop. Where do you get glop? Well, you may have noticed that the wondrous set of stomach pics I gave you contains several chewing pics as well. Just copy and paste the glop right out of those mouths and stick it wherever you want--in front of her, behind her, on top of her, anywhere.

Now she looks like she's in a stomach that sees some use!
But wait. The stomach is all slimy, yet she's dry. WTF. Well, let's slime her up then!
Now, as those who have tried this can attest, making a dry person look wet is not easy to do. But there is a trick you can use to make people look slimy.
A few people already know the plastic wrap trick, but it doesn't work particularly well. But with a few extra steps, it can.
First, go to your girl and increase the contrast on her by about +20 (Image menu > Adjustments > Brightness/Contrast). Then duplicate the layer she's on. Now go to Filters > Artistic > Plastic wrap. The default settings should be fine. Now you'll have a girl who's got grey shit all over her. Whoopty fuckin' do.
But here's the trick: Go to Select > Color Range. Click on a white area, then click on the eyedropper with the plus sign next to it:
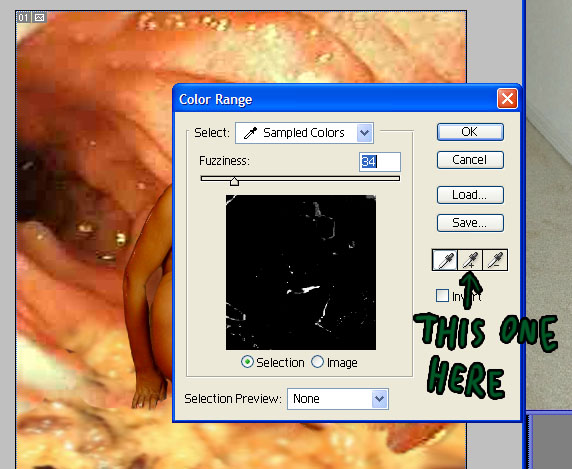
Then click on a few more of the white areas until you've got the white parts highlighted, but not the grey ones. (You can also fiddle with the fuzziness meter to change how much you select)
Once you've selected the white parts, hit CTRL-I to invert your selection, then hit delete to delete everything outside of the white areas. Change the layer type to Screen, change the opacity to around 50% and presto, you've got yourself a slimy-looking lady.
You can fiddle with the opacity according to what looks right in any given picture, and sometimes you'll need to change the plastic wrap settings too. But you get the idea. Obviously, you should erase any highlights that are obviously wrong, such as big highlights across the eyebrows or hair.
So she's looking pretty good now. It's not perfect--the pose is a bit off from the stomach and it could use some detail like painting in drips and bubbles of goo and such, but it serves to demonstrate most of the basic techniques I use when making a stomach-view photo manip. The last thing I usually do is blur any harsh edges and color-correct using overlay layers and soft lights, but that isn't really necessary in this instance.
So, without further adieu, the finished product, at the actual working size I used:
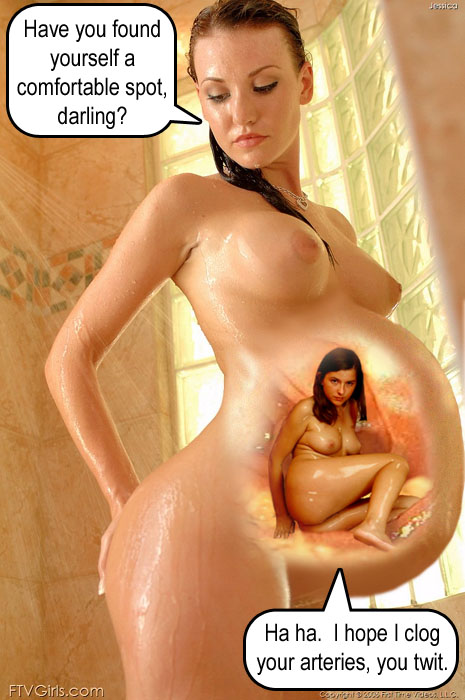
And, of course, once you've got an inside pic and an outside pic, you're well on your way to a combo meal:
Thus concludes what I hope has been at least a remotely informative tutorial. Peace out, my homiez.
Duamutef