In the following text I shall impart to thee some of my arcane secrets in making dirty pictures into even dirtier pictures using the black art of "Photo-manipping," particularly as it pertains to vore.
To cover all of the bases, we will actually be making a short series of manips, because the needs of a full-belly pic, for example, are quite different from those of an inside-view pic or an *ahem* "Out the backdoor" pic.
First, as with any craft, you need your tools.
These are:
That's basically it.
We'll start with a "Big Belly" pic, since they're the easiest.
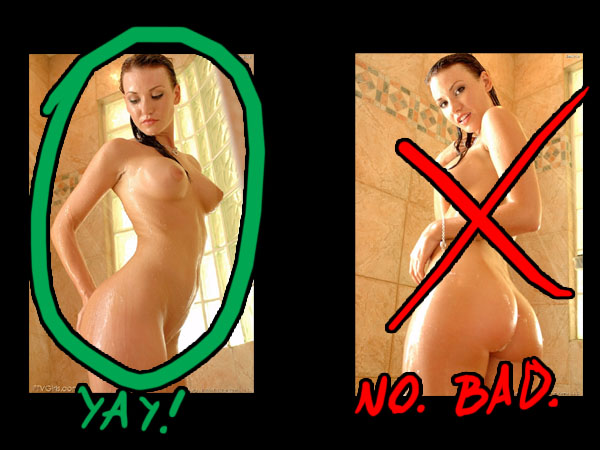
The first thing you want to do is pick your happy predator. I assume you don't need all that much help with this part, but I would recommend you choose a girl that you have more than one picture of, for reasons that will become apparent later.
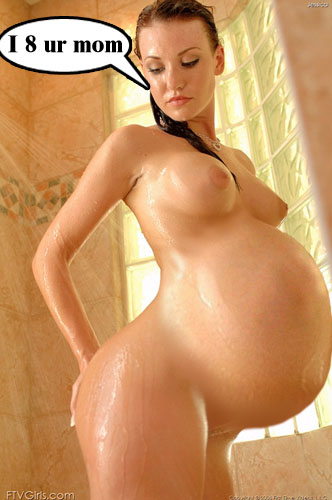
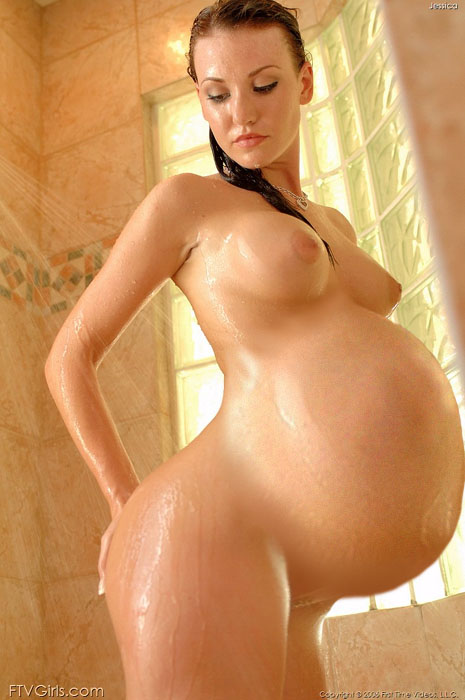
If you're a beginner, you'll want to pick a picture on which the belly of the woman is free of obstacles:
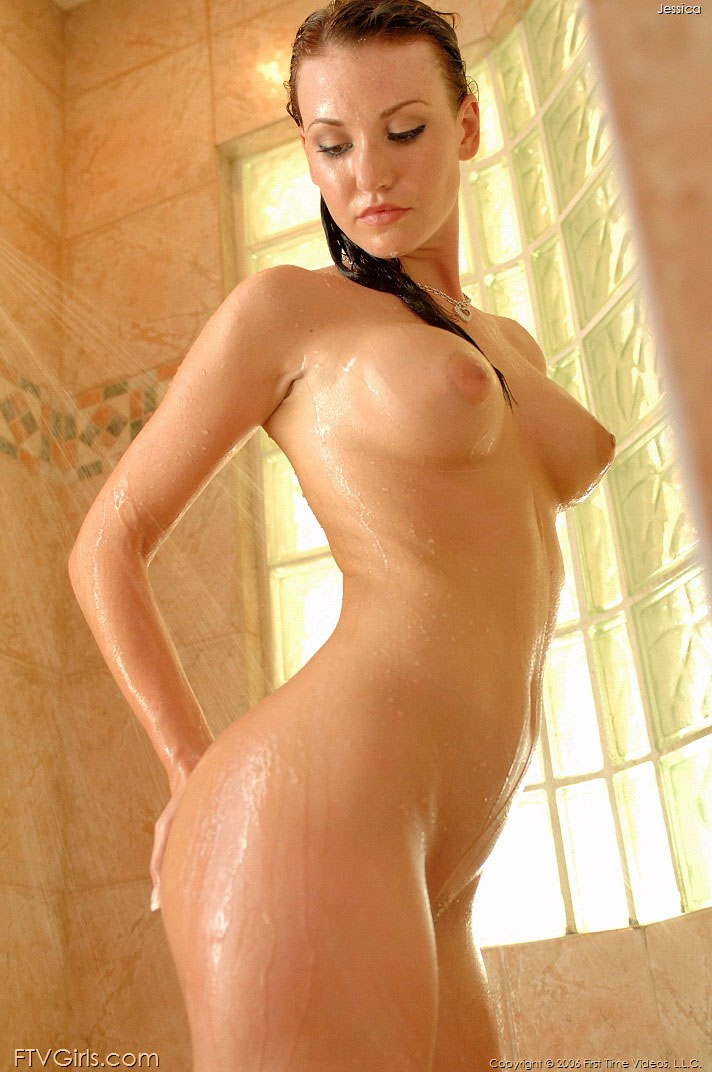
Thus, we're going to be working on this first picture. If you want to work alongside, here's the original:
Now, you might assume that the best thing to start out with would be stretching out her belly, right?
Hell no. Stretched versions of flat stuff never look real, because when you stretch something that's flat, you end up with a wider version of something that's still flat.
The skilled thief never goes for the obvious answer, and a thief we will be. For example, see that second picture above? Sure, her belly is covered up, but take a look at her booty. Looks pretty well rounded, doesn't it?

So how's about we use that instead?
Sure, it's an asscheek, not a belly. But nobody else needs to know that.
So, we cut out the asscheek. You can do this freehand using the freeform or magnetic selector tools, but in a case like this, I would recommend using the quick mask mode:

This will allow you to paint your selection right on the canvas. First, hit CTRL-A to select the entire canvas. Then set white as your color and paint over the parts of the buttcheek you want to cut out. The parts you don't want will be highlighted in red, whereas the stuff you want won't be. In other words, you want it to look like this:

Generally, at this stage it's better to have to much than too little, because you can erase any excess off later.
Once you've painted in the mask you want, click on the button just to the left of the quick mask button; that will take you back to normal selection mode. The area you painted in should be highlighted. Copy it and paste it into the image you want to edit:

Looks shitty, doesn't it? Why is that?
Well, for one thing, it's not color-corrected. The second picture has different color values and light than the first. Second, and more importantly, our buttcheek-belly isn't catching light from the same sides as the rest of the body. See all those highlights on the left side of her? See how they're all NOT on her belly?
Now, you can correct all of these problems manually. However, this is meant to be a beginner's tutorial, so I'll show you an easier way to fix it: find something that already HAS the right lighting and color.
Go up and select her right breast like you did with her butt. Copy it, and stretch it over where her belly should be.
Yes, that's what I said. Stop looking at me like I'm crazy..
You should end up with something like this:
Hooray! Now she's a Picasso.
Yes, she looks very mutated. But at least the lighting and color are right. Now we just need to remove the whole "Mutant" thing and make it look like it's actually part of her body.
First, the mutant nipple. Really easy to fix.
Grab the smudge tool (if you don't know where it is, just press "R"). Go to the tool mode menu (if you're in photoshop 7, it will be in a dropdown menu at the top of the screen). Change it's mode to "Lighten." Grab a soft brush, set the strength to about 35%, then smear inwards from the edges of the nipple. That nipple will disappear in no time, leaving you with something like this:

Better, but the place where the nipple was still looks a bit off. There's two reasons for this: The smearing won't leave the right color values or lighting, and second, it lacks the texture of the rest of the skin--it's too smooth. Fixing the lighting and color is, unfortunately, something you'll have to figure out on your own--just go with what looks right. The second, however, is easy to deal with. Skin basically just has a dappled texture; it's like pink with just a little tiny bit of white noise. Just making the skin a little bit noisy will restore some of it's realism. Select the area that looks too smooth, then go into the Filter menu and select Texture > Grain. Leave the contrast at 50 and set the intensity to around 10. Set the grain type to "Soft" or "Clumped," depending on the size you're working at. This will restore the skin's dappled texture for little effort.
Now we've got to get the damn thing to look like it belongs there.
The most glaring problem is the big hole between her crotch and her belly. This is where you do your stretching. If you're using Photoshop or another tool that has a liquify or grid distort, use that. If not, you'll need to use the smudge tool or somesuch. Stretch her big belly towards her and stretch her crotch and flat belly outwards to meet it. If you're using the liquify tool, make sure you make your changes on a duplicated layer and erase any areas where you've stretched the background.
So now we've got something like this:

Still not particularly good, but now we can start making it look good. Next, we're going to stitch them together. This stage involves liberal use of the smudge tool. Take it from lighten mode to normal mode. This is mostly a matter of eyeballing and doing what you think will work, but there are a few general tips I can give you:
So after a basic smudge job (man, that sounds dirty) we've got this:
Next we move onto lighting and color. There's still places that look wrong--for example, look under her right breast. You can see the lighter parts overlapping the darker parts. It's obviously wrong crap like that we want to eliminate.
For that part in particular, it's best to simply match up the colors and put in a bit of darker color where it's needed. In the layers window, lock the transparency on the belly layer by clicking on the little box with the squares in it. This will prevent you from painting anything but the belly. In the places where it's too bright or too dark, simply grab the color that it should be (i.e. the color that's next to it) and paint it in with a soft airbrush. (This is one of the places where the drawing tablet comes in handy.)

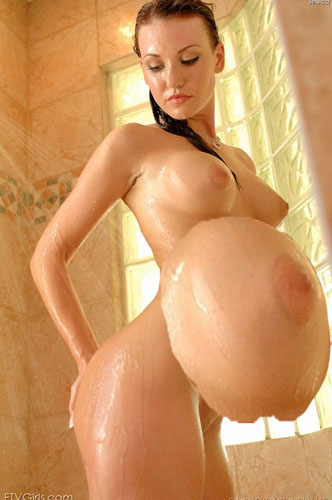
So that leaves us with this, which--wait, I guess that actually looks pretty good. Good enough for our purposes, at least. So really, all there is left to do is add a cute little vorish caption:
...and it's ready to upload to your favorite message board.
Wasn't that easy, kids?
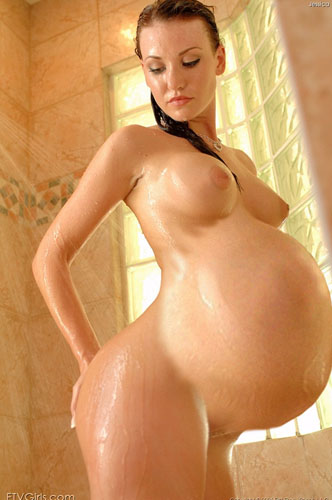
For those who are interested, here is the finished pic at it's glorious full size (At least, this was the size I was working at):
Ain't she purdy?
Now, onto creating the inside view...